
How can you apply Silicone Sealants?
Silicone sealant is used to fill seams and other gaps, as well as to finish joints and keep out moisture. Because it's elastic, it can go on for a certain amount of movement. Sausages and cartridges are both available for silicone sealant. A single cartridge can cover a seam that is approximately 12-13 metres long and 5 mm thick.
Which silicone sealant should be used?
The sealant's composition impacts how pliable it is and how quickly it hardens. For general use, a general-purpose silicone sealant is an excellent option. A bathroom silicone sealant and clear silicone waterproof sealant are the finest choices for usage in the bathroom or other damp places. This prevents the joint from blackening over time. It's important to keep in mind that some silicone sealants can be painted over, while others can't.
How can you apply the silicone sealant?
Here are a few tips by Bondzil, a silicone sealant manufacturer:
Bonding
Not all silicone sealants are appropriate for all applications. Acryfill sealants, for example, are not appropriate for use on glass, tiles, or other smooth surfaces, whereas silicone rubber, Teflon, and bitumen sealants adhere to bitumen surfaces and roofing materials better. In some circumstances, adhesion can be increased by applying a primer layer first.
Painting all over the sealant
General-purpose silicone sealants come in a variety of colours, including white, grey, black, brown, and translucent. You can paint the sealer the same colour as the underlying surface or choose a colour that best complements the underlying surface. Check the box first to see if the general-purpose silicone sealant may be painted over. If you plan to paint over the sealant, keep in mind that paint is not elastic, so if the joint moves, the paint may split later.
Oxidation
If the silicone sealant contains any acidic ingredients, the underlying surface may oxidise. Mirrors, stone and marble tiles, aluminium, and copper are all susceptible to this. Choose an acid-free silicone sealant to ensure that this does not happen. You may readily test this by sniffing the cartridge's underside.
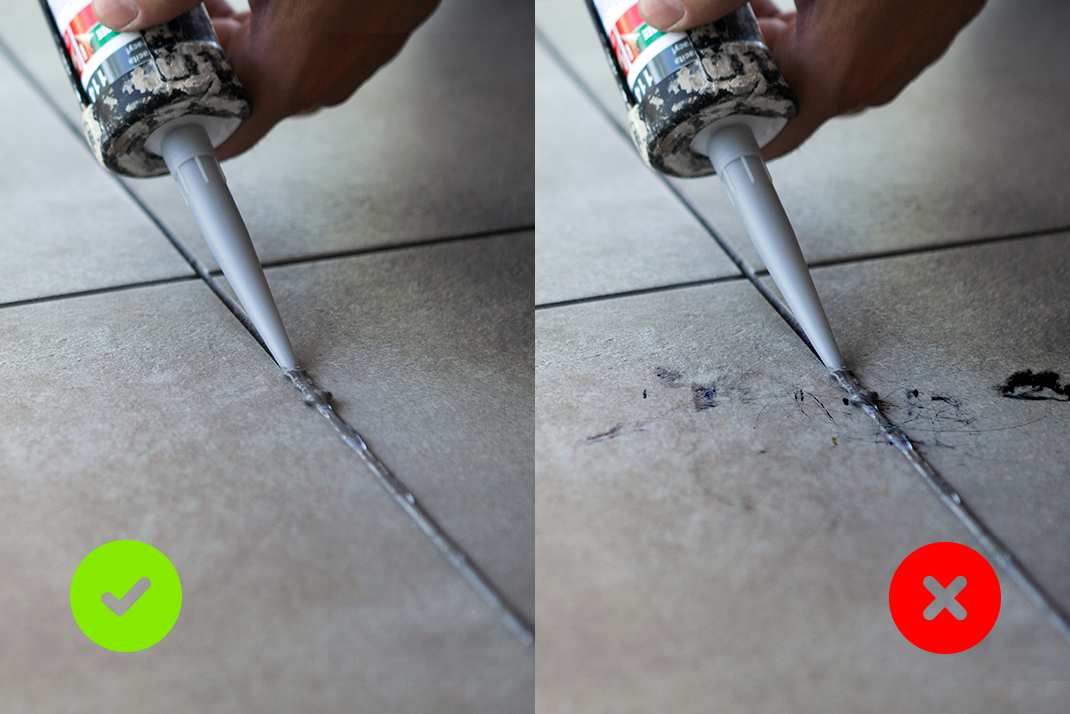
The surface should be cleaned
Remove all loose material with a triangular scraper or a sharp knife before filling a fissure in the corner of a wall. Then use a brush or a vacuum cleaner to clear the gap. Use spirit or degreaser to get rid of any glue, sealant, or oil residues.
Masking
Use masking tape if you want the cleanest possible result and aren't sure if you'll be able to apply the sealant in a completely straight line, especially in hard-to-reach areas. Remove the tape before the silicone sealant dries, making sure it covers both sides of the line to be sealed.
Taking good advantage of the sealant cartridge
Cut the cartridge seal with a hobby knife. Then, to create a narrow line of silicone sealant, cut off a small portion of the applicator nozzle's tip. The sealant line will be wider if you cut off a larger portion of the nozzle. Make the sealant line 1 or 2 mm broader than the space that needs to be filled. The cartridge should then be loaded into the silicone sealant gun. The applicator nozzle will fill with sealant when you pull on the handle. As soon as you see the silicone sealant, stop.
Creating a seal
Holding the sealant gun at a 45° angle and pulling it towards yourself is the optimal operating position. You'll need to select the right operating speed to apply the sealant neatly. You'll get a lumpy, irregular sealant surface if you move too slowly, and you'll waste sealant unnecessarily. You won't obtain a proper filling of the gap if you move too quickly. Release the handle and press the button or lever on the back of the sealant gun when you reach the end of the seam. As a result of the pressure being released, the flow of sealant comes to a halt. If you don't, the sealant will continue to come out of the nozzle.
Bringing the sealant line to a close
Wet your finger with soapy water and smooth down the seam in a dish or basin. The silicone sealant won't stick to your finger because of the soap. You can also use a plant spray to apply soapy water. With soapy water, remove any leftover sealant remnants. Remove the silicone sealant with a knife and a firm sponge when it has cured. To apply and remove silicone sealant, special spatulas and cleansers are available.
Silicone Sealants work in the best way to seal and fix almost any surface. At Bondzil, we help you deal with all your concerns regarding fixings and sealings. You can check from our wide variety of products available and see what works out the best for your purpose. We have general-purpose silicone sealant, clear silicone waterproof sealant, bathroom silicone sealant etc. We provide a cost-effective, authentic and durable product range for you. If you have any queries, you can email us at info@bondzil.com or ring us at 1800 212 6274 (India) or +91 8100041000 (International). Happy Fixing!